


Creating a milk carton lampshade DIY project is one of the most satisfying ways to transform everyday waste into stunning home décor. The MilkBell lampshade is my latest addition to a series of upcycled design lampshades, and it showcases just how versatile plastic milk cartons really are. These discarded containers are absolutely perfect for crafting lampshades because they’re made from sturdy plastic, offer fantastic transparency, and are surprisingly easy to work with. If you’ve never attempted a milk carton lampshade DIY before, this guide will walk you through every step of the process.
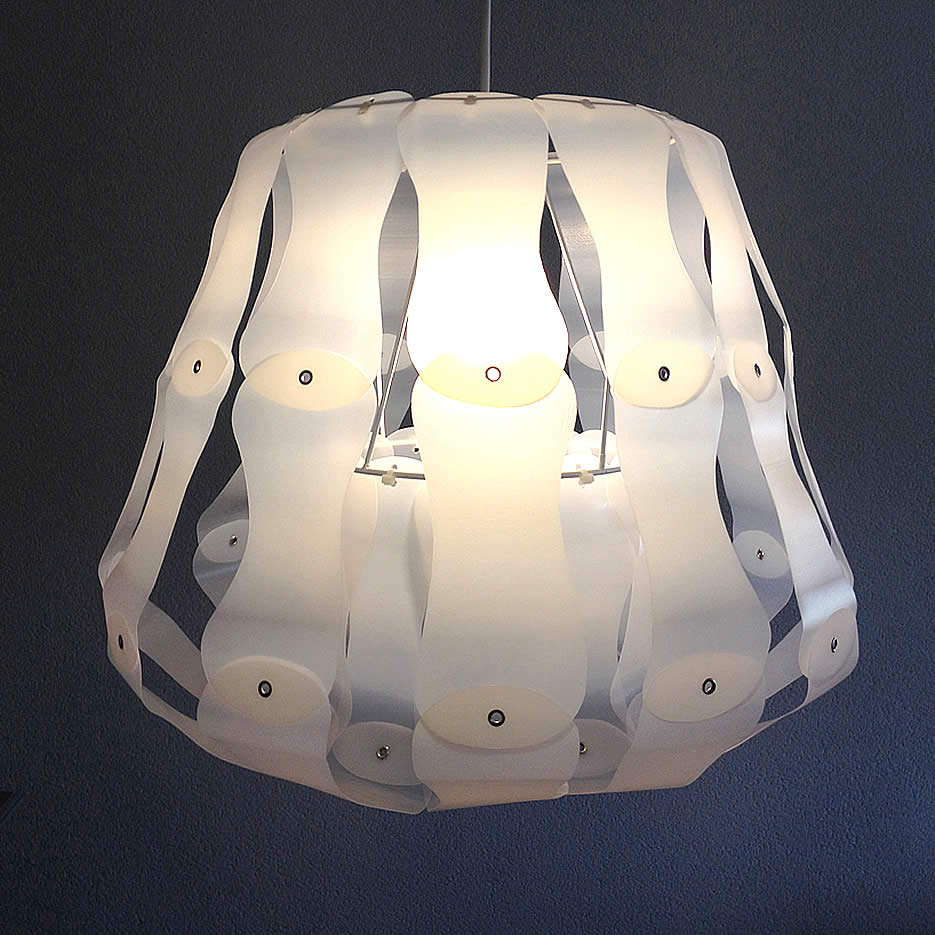
Plastic milk cartons deserve a second life in your creative projects. Unlike many materials, they have the ideal combination of properties that make them exceptional for lighting design. The plastic is rigid enough to maintain its shape, yet translucent enough to allow beautiful light to filter through. This transparency creates a warm, diffused glow that’s far more interesting than traditional fabric lampshades. Plus, milk cartons are free if you’re recycling your own household waste, making this a truly budget-friendly craft project.
The durability of plastic milk containers means your finished lampshade won’t degrade or yellow quickly. You’ll be looking at a functional piece of art that actually improves your living space while reducing waste in landfills. That’s the beauty of upcycling—creating something beautiful that’s also good for the planet.
Understanding the MilkBell Design

The MilkBell lampshade is a variation on the MilkDrop lampshade design. While the MilkDrop uses a single lamp frame ring, the MilkBell incorporates a frame with two connected rings—a larger top ring and a smaller bottom ring. This two-ring system creates that distinctive balloon or bell shape that gives the lampshade its name. The varying diameter between the rings produces a graceful, sculptural form that catches the light beautifully from every angle.
Materials You’ll Need
Before you start your milk carton lampshade DIY project, gather these essential supplies:
- 24 plastic milk cartons (plus 1 spare, just in case)
- Small snap-off blade knife
- Scissors
- Eyelet Crimping and Hole Punch Function Pliers with eyelets
- Lamp frame (24/19 cm diameter works perfectly for this size)
- Tie-wraps, 20 cm length / approximately 3 mm width
Step-by-Step Instructions

Start by cutting your milk cartons into strips. You’ll want to create consistent pieces that will eventually form your lampshade structure. Wash and dry your milk cartons thoroughly before cutting to ensure clean edges and better visibility of your work.
The real magic happens when you use the eyelet crimping pliers to join your plastic pieces. This tool allows you to connect the strips with metal eyelets, creating longer segments with a professional finish. The eyelets not only hold the pieces together—they also add visual interest and prevent the edges from fraying or becoming sharp.
Next, attach one end of all 12 strips to the top ring of your lamp frame, spacing them evenly around the circumference. Then, take the opposite ends of these same 12 strips and secure them to the smaller bottom ring. This creates the beautiful bell shape as the strips fan out and curve between the two rings. Use your tie-wraps to hold everything securely in place.
Embracing Trial and Error
I’ll be honest—even after making many lampshades, there’s always something new to learn with each project. Trial and error isn’t a drawback; it’s actually part of the creative process. Don’t be discouraged if your first attempt isn’t perfect. Each lampshade teaches you something valuable about how the materials respond, how light behaves through the plastic, and what adjustments might work better next time.

The beautiful thing about this milk carton lampshade DIY is that there’s room for personalization. You can experiment with different strip widths, vary the number of strips, use cartons of different colors, or adjust your ring sizes. Your creativity is the only limit.
Finishing Touches
Once your lampshade structure is complete, add your light fixture according to your lamp frame’s specifications. Step back and admire how the light transforms the plastic milk containers into something magical. The translucent quality creates a soft, ambient glow that’s perfect for bedrooms, living rooms, or accent lighting in any space.
Share your creation and your experience with other upcycling enthusiasts. Did you discover any tips or tricks along the way? Have fun with your project, and remember that every lampshade you make is helping reduce plastic waste while beautifying your home.
Design by Gilbert de Rooij | Photos © Gilbert de Rooij
Since you’re here …
I have a small favor to ask. Thousands are visiting upcycleDZINE for upcycle design inspiration every month. Readers in more than 100 countries around the world are now able to support financially.
upcycleDZINE is a completely independent niche site, is very work-intensive, and offers tons of unique information for free.
To keep upcycleDZINE running, I’m asking you for your support.
Your contribution will allow me to:
– meet the hosting costs
– upgrade to keep track of traffic increases
– add new content, and keep improving the older content
– add new functionalities to this site
– improve how it works and how it looks
– and last but not least, my daily dose of coffee 🙂
Again, all contributions will be reinvested into the aforementioned associated costs of running this blog and will help ensure the ongoing quest for quality upcycle design.
Your kindness and generosity will be greatly appreciated and will give me the motivation to continue.
Every contribution, however big or small, is so valuable for the future of upcycleDZINE.
Support today from as little as $2 – it only takes a minute. Thank you.